Barbell Alternate Biceps Curl
The barbell alternate biceps curl is a classic exercise for sculpting and strengthening your biceps. This targeted movement, isolating the biceps brachii muscle, adds definition and size to your upper arms. While seemingly simple, proper form and execution are crucial for maximizing your gains and preventing injury.

The barbell alternate biceps curl involves performing bicep curls one arm at a time, utilizing a loaded barbell. This unilateral approach allows for focused attention on each bicep individually, ensuring balanced development. Compared to traditional bicep curls, the alternating version reduces momentum and eliminates swinging, emphasizing strict muscle activation.
How to Do It?
- Stand tall with your feet shoulder-width apart: Engage your core and maintain a slight bend in your knees for stability.
- Grip the barbell with palms facing forward: Choose a weight that allows you to perform 8-12 repetitions with strict form. Your thumbs can wrap around the bar for extra grip, but avoid death gripping.
- Keep your elbows tucked close to your torso: Throughout the entire movement, avoid flaring your elbows outward. Imagine your upper arms fixed against your sides.
- Curl one arm up towards your shoulder: Contract your biceps, raising the barbell towards your chest while keeping your wrist straight. Squeeze your bicep at the top and hold for a second.
- Slowly lower the dumbbell back down: Maintain controlled movement and resist gravity with your bicep until the weight fully extends.
- Repeat the curl with the opposite arm: Continue alternating repetitions, focusing on mind-muscle connection and controlled contractions.
Benefits
- Increased bicep muscle size and definition: The barbell alternate curl effectively targets both bicep heads, leading to greater muscle growth and sculpted arms.
- Improved muscle balance: By working each arm individually, you can address any strength imbalances between your biceps, ensuring both sides develop equally.
- Enhanced mind-muscle connection: The focused nature of the alternating curl forces you to concentrate on bicep activation, leading to better control and improved muscle recruitment.
- Strength development: Progressively increasing the weight used in this exercise gradually strengthens your biceps, allowing you to handle heavier loads in other exercises.
Muscles Worked
- Biceps brachii: The primary muscle targeted, responsible for flexing the elbow and supinating the forearm.
- Brachialis: A secondary muscle located under the biceps, assisting in elbow flexion.
- Forearms: The flexor carpi ulnaris and radialis contribute to wrist stabilization and grip strength.
Cable Kneeling Biceps Curl
The cable kneeling biceps curl adds a unique twist to the classic bicep curl, offering a fresh challenge and impressive sculpting potential for your upper arms. By kneeling and utilizing the constant tension of a cable machine, you’ll engage your biceps in a novel way, maximizing muscle activation and leading to defined, powerful arms.

Unlike traditional standing curls, the kneeling position eliminates momentum and stabilizes your core, forcing your biceps to do all the work. The cable machine’s continuous resistance throughout the entire range of motion further intensifies the exercise, ensuring no resting points for your muscles.
How to Do It?
- Set the cable machine to an appropriate weight: Choose a weight that allows you to perform 8-12 repetitions with strict form. Remember, the constant tension of the cable can feel heavier than free weights.
- Attach a straight bar handle to the cable machine: Alternatively, you can use a D-handle or EZ-bar depending on your grip preference.
- Kneel on the floor with your knees hip-width apart: Position yourself facing the cable machine with your toes pointed slightly outward for stability.
- Maintain a neutral spine and engage your core: Avoid slouching or arching your back. Keep your chest lifted and your shoulders down.
- Grip the handle with palms facing forward: Keep your elbows tucked close to your sides throughout the movement.
- Curl the handle towards your shoulder, squeezing your biceps: Focus on contracting your biceps to raise the weight rather than using momentum. Breathe out during this phase.
- Hold the peak contraction for a second: Savor the bicep activation at the top of the movement.
- Slowly lower the handle back down with controlled resistance: Resist gravity with your biceps throughout the lowering phase. Breathe in as you lower the weight.
- Repeat the curl with the opposite arm: Continue alternating repetitions for the desired number of sets and reps.
Benefits
- Intensified bicep activation: The kneeling position and cable machine’s constant tension ensure your biceps are constantly engaged, leading to greater muscle growth and definition.
- Improved core stability: Holding the kneeling position throughout the exercise strengthens your core and improves overall stability.
- Reduced risk of cheating: Unlike standing curls, the kneeling position minimizes momentum and swinging, forcing you to rely solely on your biceps for the movement.
- Variety and challenge: This exercise adds a refreshing twist to your bicep routine, preventing plateaus and keeping your workouts engaging.
Muscles Worked
- Biceps brachii: The primary muscle targeted, responsible for flexing the elbow and supinating the forearm.
- Brachialis: A secondary muscle located under the biceps, assisting in elbow flexion.
- Forearms: The flexor carpi ulnaris and radialis contribute to wrist stabilization and grip strength.
- Core: Maintaining the kneeling position engages your core muscles for added stability.
Cable Two-Arm Curl on Incline Bench
The cable two-arm curl on incline bench takes a familiar exercise and adds a unique twist, providing an effective way to isolate and sculpt your biceps from a fresh perspective. By utilizing the constant tension of a cable machine and the stabilization of an incline bench, you can maximize muscle activation and build impressive definition in your upper arms.

Unlike traditional standing bicep curls, this variation minimizes momentum and forces your biceps to do all the work. The incline bench keeps your torso positioned for optimal bicep engagement, while the cable’s continuous resistance ensures no slacking throughout the range of motion.
How to Do It?
- Set the cable machine to an appropriate weight: Choose a weight that allows you to perform 8-12 repetitions with strict form. Remember, the constant tension of the cable can feel heavier than free weights.
- Attach a single handle to both low pulley cables: You can use a straight bar handle, D-handle, or EZ-bar depending on your grip preference.
- Adjust the incline bench to a 30-degree angle: This angle provides optimal bicep activation while still maintaining stability.
- Lie back on the incline bench with your feet flat on the floor: Keep your core engaged and avoid arching your back.
- Grip the handle with palms facing forward: Keep your elbows tucked close to your sides throughout the movement.
- Curl the handle towards your shoulders, squeezing your biceps: Focus on contracting your biceps to raise the weight rather than using momentum. Breathe out during this phase.
- Hold the peak contraction for a second: Savor the bicep activation at the top of the movement.
- Slowly lower the handle back down with controlled resistance: Resist gravity with your biceps throughout the lowering phase. Breathe in as you lower the weight.
- Repeat the movement for the desired number of sets and reps.
Benefits
- Intensified bicep isolation: The incline bench position and cable machine’s constant tension ensure your biceps are constantly engaged, leading to greater muscle growth and definition.
- Improved mind-muscle connection: Focusing on squeezing your biceps at the top of each repetition enhances the connection between your brain and the working muscles.
- Variety and challenge: This exercise adds a fresh twist to your bicep routine, preventing plateaus and keeping your workouts engaging.
- Reduced risk of cheating: The incline bench position minimizes momentum and swinging, forcing you to rely solely on your biceps for the movement.
Muscles Worked
- Biceps brachii: The primary muscle targeted, responsible for flexing the elbow and supinating the forearm.
- Brachialis: A secondary muscle located under the biceps, assisting in elbow flexion.
- Forearms: The flexor carpi ulnaris and radialis contribute to wrist stabilization and grip strength.
Conquering the Chin Up Around the Bar
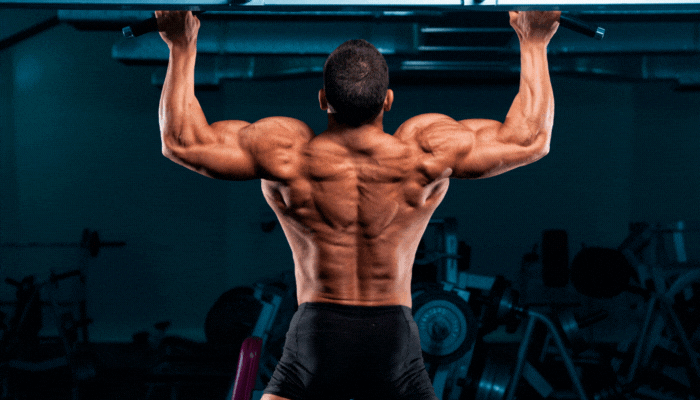
The chin up around the bar, also known as the chin up pullover, is an advanced calisthenics exercise that takes the classic chin up to a whole new level. It requires not only upper body strength and coordination, but also flexibility and spatial awareness. While challenging, mastering this move can dramatically improve your overall pulling strength, build impressive back and shoulder muscles, and add a dynamic element to your workout routine.

The chin up around the bar involves pulling yourself up to the bar, but instead of stopping at the top, you continue the momentum to swing your body around the bar and end up facing the opposite direction. Imagine performing a half somersault while hanging from the bar, using your arm and core strength to control the movement.
How to Do It?
- Grip the bar with an overhand grip, slightly wider than shoulder-width apart. Engage your core and keep your body straight with a slight bend in your knees.
- Pull yourself up towards the bar, focusing on using your back and biceps muscles. Aim to bring your chin above the bar.
- As you reach the top of the pull, initiate a slight kip with your legs to gain momentum. Simultaneously, push your chest through the bar and extend your arms to start swinging your body around.
- Keep your core tight and maintain a slight arch in your back as you swing around the bar. Focus on pulling your elbow towards your hips as you pass over the top.
- Control your descent and land softly facing the opposite direction. Once stable, you can perform another chin up around the bar or simply lower yourself down from the bar.
Tips for Beginners:
- Start with easier variations: Before attempting the full chin up around the bar, practice regular chin ups and assisted chin up pullovers using resistance bands or a partner.
- Focus on form over speed: It’s more important to execute the movement correctly with proper control than to swing around the bar quickly.
- Don’t be afraid to ask for help: If you’re new to calisthenics, consider working with a trainer or experienced friend to learn the proper technique and avoid injury.
Benefits
- Increased upper body strength: The chin up around the bar engages a wide range of muscles, including your back, biceps, shoulders, and core, leading to significant strength gains.
- Improved flexibility and coordination: This exercise demands a combination of strength, flexibility, and coordination, enhancing your overall athleticism.
- Stronger grip: The overhand grip required for this exercise strengthens your forearms and hand grip.
- Dynamic workout: The chin up around the bar adds a fun and challenging element to your workout routine, making it more engaging and effective.
Muscles Worked
- Latissimus dorsi: The primary muscle responsible for pulling your body up and around the bar.
- Biceps brachii: Assists in pulling and flexing the elbows.
- Rhomboids and Trapezius: Stabilize your shoulder blades and upper back.
- Core muscles: Provide stability and control throughout the movement.
- Forearms: Grip strength is crucial for holding onto the bar.
Safety Precautions:
- Only attempt this exercise if you have a strong foundation in chin ups and other pulling exercises.
- Warm up properly before attempting the chin up around the bar to prevent injury.
- Start with a lower bar or use a box or bench to assist you until you build enough strength.
- Focus on maintaining proper form and control throughout the movement.
- Discontinue the exercise if you experience any pain or discomfort.
With dedication and proper training, the chin up around the bar can be a rewarding addition to your workout routine. So, take your calisthenics skills to the next level, embrace the challenge, and conquer this impressive feat of strength and agility! Remember, safety is always the top priority. If you’re unsure about your ability to perform this exercise safely, consult with a qualified trainer or fitness professional. With proper guidance and preparation, you can unlock the full potential of the chin up around the bar and take your fitness journey to new heights.
Elbow Flexion
Elbow flexion, the act of bending your arm at the elbow joint, might seem like a simple everyday movement. Yet, when incorporated into an exercise routine, it becomes a powerful tool for sculpting and strengthening your upper arms. From everyday activities to athletic performance, robust elbow flexors translate to improved power, grip strength, and definition. In this article, we’ll delve into the world of elbow flexion, covering its key aspects, benefits, and how to unlock its potential for building stronger, more defined arms.

Elbow flexion, in the context of exercise, involves contracting the biceps brachii muscle to bring your forearm towards your upper arm. This action primarily involves pulling weight or resistance towards your body, causing the biceps to shorten and thicken, leading to increased muscle size and definition.
How to Do It?
Numerous exercises engage your elbow flexors, offering variety and tailoring to different fitness levels. Here are a few key examples:
- Bicep curls: The classic dumbbell bicep curl, performed standing or seated, effectively isolates the biceps for focused growth.
- Chin-ups: This bodyweight exercise utilizes your own weight for resistance, building both biceps and back strength.
- Hammer curls: With palms facing inwards, this curl variation targets the brachialis muscle under the biceps, adding thickness and definition.
- Concentration curls: Isolating one arm at a time, this seated exercise allows for controlled focus on each bicep individually.
- Preacher curls: By resting your upper arms on a preacher bench, you minimize momentum and maximize bicep activation.
Benefits
Beyond sculpted arms, strong elbow flexors offer a multitude of benefits:
- Improved athletic performance: Powerful biceps aid in pulling movements, crucial for activities like climbing, rowing, and throwing.
- Enhanced grip strength: Strong forearms, secondary muscles involved in elbow flexion, translate to better grip and hand strength.
- Posture support: Developed biceps contribute to good posture by pulling your shoulders back and stabilizing your upper body.
- Injury prevention: Strong, flexible elbow flexors are less prone to injury, especially in sports and physically demanding activities.
Muscles Worked
While the biceps brachii is the primary muscle targeted in elbow flexion, several other muscles play supporting roles:
- Brachialis: Located under the biceps, this muscle assists in elbow flexion and adds thickness to the upper arm.
- Forearms: The flexor carpi ulnaris and radialis contribute to wrist flexion and grip strength.
- Brachialis anticus: This smaller muscle assists in elbow flexion and supination (turning the forearm outwards).
Remember, proper form is paramount for maximizing benefits and minimizing injury risk. Focus on controlled movements, engaging your biceps throughout the exercise, and avoid swinging or momentum. Consider starting with lighter weights and gradually increasing the resistance as you build strength. Consulting a certified trainer can help ensure proper technique and tailor exercises to your fitness level and goals.
In conclusion, elbow flexion isn’t just about building impressive biceps; it’s a gateway to improved strength, performance, and overall well-being. By incorporating various elbow flexion exercises into your routine, you can unlock the potential for sculpted arms, a stronger physique, and enhanced daily function. So, grab your weights, embrace the challenge, and start flexing your way to a fit and sculpted you!


